About

This blog is for video and graphic design.

Thursday, December 18, 2014

Exciting Career at SeaWorld

Reflection
I really enjoyed the first semester of video. My favorite project was our final and the music video and the Lego project. My least favorite project was the six shot sequence videos.

I enjoyed the music video because we were allowed to be as creative as we wanted. We had more freedom and could choose major components, including the song and the story. I enjoyed that it was more vague and that we also got the opportunity to shorten and fix it.


I liked the final because there was a lot of different stories that could be told with the clips provided. I thought it was challenging to not know the story until I actually started editing, but I thought it was fun. I was able to choose whatever I wanted and create any story. I also liked that there was a strict time requirement, so I knew that my video wouldn't be too long or too short.


I also enjoyed the Lego project because I was able to choose the story I wanted to tell. The people I filmed made it easy to find a story to tell. I also liked that it was different than the other projects we had done.


I did not like the six shot sequence videos because they were tedious to film and edit. There was not a lot of options to express creativity. I also disliked them because I found them more difficult to edit to create an interesting story.


Overall, I have enjoyed my first semester in video and I look forward to the second semester.

Wednesday, December 10, 2014

Working Together With Legos Creates Challenges and Donating Blood Saves Lives

Process

For both projects, there was a not lot of preproduction and it differed from previous projects. For this project, there was no storyboarding. There was not any idea of what the true story would be. It was a project that could be interpreted many ways. 

In production, there were a lot of challenges. It was very difficult not using a tripod. It was hard trying to keep the camera steady. It was also very hard thinking of questions to ask on the spot. In the lego project, it was easier because the "actors" knew that you were going to be asking questions and moving around. For the blood drive, the people did not know exactly what you were going to do, so it was more difficult. Although there was difficulty, I able to get all of the needed shots.

In postproduction, I found it difficult to juggle both projects. It was hard remembering which project needed certain edits. I had trouble creating J and L edits, but in the end, I created them. I had to create a script and add voiceovers. I thought this was the hardest project to edit.

Things I Learned

I learned how to add voice overs to my video. I also learned how to create J and L edits to make the transitions smoother and less choppy. I learned how to do backpack journalism.

Reflection and the Future

In the future, I will be able to use voiceovers and J and L edits to enhance my video. I will be more experienced in backpack journalism. I enjoyed this project because I got to be more creative than previous projects and I got to choose the story that would be told.

Tuesday, December 9, 2014

Glossy Gold


Process

I followed the tutorial to create the glossy text. I was unable to download the background that it wanted, so I created my own. I applied all of the effects to the "Zoey" and I applied some of them to the "Zoey Chasen". One of the effects that I needed was not available, so I chose one similar to the original. Although it is not identical to the tutorial, I am very happy with how it turned out.

In The Future

In the future, I will be able to apply my knowledge of effects to future projects. I learned a lot about different effects, including satin. I learned a lot about overlays. I enjoyed this tutorial because I had to problem solve a lot and in the future I will have the necessary problem solving skills to finish more difficult tutorials.

Reflection

I am very happy with the outcome of this tutorial. It was very simple and well explained. I love how the glossy gold looks.

Monday, December 8, 2014

Postcards


Zoey Postcard


I chose to put one of my dogs in the Z because my dogs are very important to me. I love animals and in five years I want to have a dog. For the O I put me and one of my best friends. I thought it was important to include my friends because they are a huge part of my brand. For the E I chose n print with Alpha Delta Pi in it, because in five years, I plan to be a member of Alpha Delta Pi. For the Y, I picked a Vineyard Vine whale print because I love Vineyard Vines.

The process was relatively easy. I created each letter, separately. Then, I placed an image for each and created a clipping mask. Then, I adjusted the coloring and the brightness. Then, I added a drop shadow and added the background and my name.

The biggest problem that I encountered was getting each letter to look cohesive. It was difficult making them fit together. I also had difficulty getting each picture to fit well with the letter.

Ocean Postcard

For this postcard, I chose starfish for my repeated object. I chose to put a fish in and a picture of the beach. I did a gradient for the word "ocean" and I used my name as a tagline. I added a border that was the same color as the tagline. For the border of the photo, I made it the same color as one of the starfish.

The process was relatively quick. I extracted each image and placed them on top of the background. I added a border to the photo and to the image. Then, I added the tagline and the word "ocean". I created a gradient for "ocean".

I love how it turned out. I think it looks cohesive and I am happy with the outcome. The biggest struggle I had was figuring out how to do a gradient in the text.

Penguin Tutorial

I chose penguins for my third postcard because I love penguins. I  added three penguins. For the tagline, I put my name and made it the color of the penguin's sweater. For the word "penguins" I did a black and white gradient, to replicate the penguins.

The process was similar to the other postcards. I added the extracted objects to a background. Then, I placed the text and added a gradient to "penguins".

I love how this postcard turned out. I think it's adorable. I love how the penguins are partially off of the postcard. I love that the large one is in comparison to the words.

Reflection

I enjoyed making the postcards. I learned a lot from this project. In the future, I will be able to apply many of the skills I learned to enhance future projects.

Monday, December 1, 2014

Professional Penguin Mountain

The Process

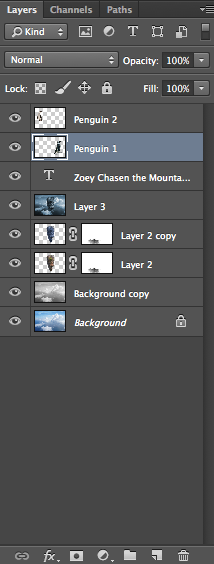
I extracted a mountain from a photo of a mountain with a waterfall and put it into the sky. I had to recreate the tip of the mountain using blend modes. I had to remove pixel fringe. 

I was able to pull a lot of information and skills from previous projects, including defringing the hand. 
Throughout the process, the refine edge tool was very helpful. It made the mountain look smoother. After extracting the mountain, I placed a cloud in front of it. 

Then, I added two objects of my choice. I chose the images from http://www.morguefile.com. I chose to add two penguins because I like penguins. To add the penguins, I used the quick select tool, which made it very easy to add them in. 

Overall, I am really happy with how my mountain turned out and I am very happy with how the penguins look. 


What I Learned

I learned how to easily extract an image and how to combine previous things I learned, such as defringing. I learned how to use overlays and how to jump layers.

The Challenge

I had trouble using the refine edge tool because the penguins blended in with the background, but I eventually got it to work. I also had trouble placing the cloud in front of the cloud. It was difficult to get it extract the cloud perfectly. 

In the Future

Next time, I will add more images. I would use that same tools if I repeated the process. In the future, I will be able to add images without pixel fringe. I will be able to pull information from this project to expand my knowledge. In the future, I will feel even more comfortable with photoshop.


Conclusion

Overall, I am very happy with how it all turned out. I think the mountain looks good and the cloud looks realistic. The mountain's tip turned out how I wanted it to. The penguins add a touch of my personality.

Tuesday, November 25, 2014

Professional Blog Post: Music Video


The Process

The process to create this music video consisted of many steps. The pre-production started with choosing a song. Then, we chose a story to go with the song. Then we created a mood board and a story board. We watched other music videos for inspiration. After, we planned the days we were going to film. 

Next, we started production. We filmed every shot that we needed and we added a few that we thought we might want. 

After filming ended, we started post-production. We edited the clips to create the video. After, we were challenged to use markers to time the clips with the beat of the song and to make the music video less than ninety seconds. We reedited the video to create the condensed version.


Things I Learned

I learned a lot from this project. I learned how to use markers to make the clips start and stop with the beat of the song. I learned how to apply effects to enhance the story. I learned how to put text in the video. 

I also learned a lot about collaboration. My group had a lot of differing view points but we had to compromise. We learned that it is beneficial to get shots even if you don't necessarily want them, because you may end up needing them or you may change your mind and want them.

Reflections and the Future

Next time, I will try to communicate better with my group. I will make the clips match up with markers better. I will make more color corrections, even if they are slight.

In the future, I plan to use markers again. I plan to apply previous knowledge and continue to focus on getting a variety of shots.

For my next project, I will use all of my knowledge that I gained from this project and previous projects to make the next project better than the previous projects.

Overall, I am happy with how this project turned out.

Postcard


I chose to put one of my dogs in the Z because my dogs are very important to me. I love animals and in five years I want to have a dog. For the O I put me and one of my best friends. I thought it was important to include my friends because they are a huge part of my brand. For the E I chose n print with Alpha Delta Pi in it, because in five years, I plan to be a member of Alpha Delta Pi. For the Y, I picked a Vineyard Vine whale print because I love Vineyard Vines.

The process was relatively easy. I created each letter, separately. Then, I placed an image for each and created a clipping mask. Then, I adjusted the coloring and the brightness. Then, I added a drop shadow and added the background and my name.

The biggest problem that I encountered was getting each letter to look cohesive. It was difficult making them fit together. I also had difficulty getting each picture to fit well with the letter.

Monday, November 17, 2014

Gradient Penguin

I created a gradient penguin. I did the corn tutorial that we did in class and did it on the penguin. Then, I repeated it and did it with a different color to create a multicolored penguin. I had to use layer masks to keep part of the color and be able to change different parts of the penguin.

Thursday, November 13, 2014

Cloud Tutorial

Tutorial: http://www.photoshopstar.com/text-effects/clouds-text-effect/


For this tutorial, I had to create a path, Then, I added the clouds inside the words. After, I added clouds outside. I put some over the words because I preferred how it looked. I liked that clouds were overlapping with the words and other clouds. I like how it turned out. It was a really easy tutorial to follow. 

Tuesday, November 11, 2014

Realistic Shadow

Objects can be extracted through many methods. For many objects, the easiest way to extract them is to use the quick select tool and to select the parts that are needed. Then, pixel fringe should be removed. Pixel fringe can be removed through many methods. Then, a shadow should be added. For my image, I chose an apple because it would be a simple start. I decided to put it on a table for my background. Overall, I am happy with how it turned out and I hope to improve my extraction skills in the future.


Thursday, November 6, 2014

Penguin Mountain

The Process

I extracted a mountain from a photo of a mountain with a waterfall and put it into the sky. I had to recreate the tip of the mountain using blend modes. I had to remove pixel fringe. I was able to pull a lot of information and skills from previous projects, including defringing the hand. Throughout the process, the refine edge tool was very helpful. It made the mountain look smoother. After extracting the mountain, I placed a cloud in front of it. Then, I added two objects of my choice. I chose the images from http://www.morguefile.com. I chose to add two penguins because I like penguins. To add the penguins, I used the quick select tool, which made it very easy to add them in. Overall, I am really happy with how my mountain turned out and I am very happy with how the penguins look. 


What I Learned

I learned how to easily extract an image and how to combine previous things I learned, such as defringing. I learned how to use overlays and how to jump layers.

The Challenge

I had trouble using the refine edge tool because the penguins blended in with the background, but I eventually got it to work. I also had trouble placing the cloud in front of the cloud. It was difficult to get it extract the cloud perfectly. 

In the Future

Next time, I will add more images. I would use that same tools if I repeated the process. In the future, I will be able to add images without pixel fringe. I will be able to pull information from this project to expand my knowledge. In the future, I will feel even more comfortable with photoshop.


Conclusion

Overall, I am very happy with how it all turned out. I think the mountain looks good and the cloud looks realistic. The mountain's tip turned out how I wanted it to. The penguins add a touch of my personality.

Friday, October 31, 2014

Bokeh Text Effect

Tutorial:
http://textuts.com/simple-bokeh-text-effect/

I did a bokeh text effect in Photoshop. It had the exact same process as the firefly effect, except it was a different brush. I created the text and altered the brush. I created a work path and applied the brush. After, I added an inner glow.

I am really happy with how this turned out. I like how it looks. I feel a lot more comfortable with work paths and brushes. The tutorial was really simple and well explained. It was quick and easy.

Wet Ink Tutorial

Tutorial: 
http://blog.spoongraphics.co.uk/tutorials/create-a-cool-wet-ink-typography-effect-in-photoshop

I did a wet ink tutorial. It was really simple because all I had to do was type the text and choose the ink marks I wanted and apply them. I really liked it because I could choose a look that I liked. The tutorial was very simple and gave me a lot of freedom. I'm happy with how it turned out.

Thursday, October 30, 2014

Pictures in Words Tutorial

I did a tutorial to put pictures into words. It was very simple. I had to copy the background layer and add another layer. Then, I put the text. After, I created a clipping mask to create this. I'm happy with how it turned out.

Tutorial:
http://www.photoshopessentials.com/photoshop-text/text-effects/image-in-text-photoshop-cs6/

Fireflies Text Tutorial

I did a firefly text tutorial in Photoshop. It was really simple. The directions were really well written and easy to follow. I'm really happy with how it turned out. I had to create a brush. After creating the brush, I downloaded the font. Then, I made a work path on the font and applied my brush. Then, I created an outer glow. I decided to put "fireflies" on the background. Overall, I am very happy with how this ended up.
Tutorial:

Wednesday, October 29, 2014

Compressed Music Video

This project was to create a compressed version of the previous video. We had to make it less than ninety seconds. It was relatively easy for me to decide which shots to keep and which shots to remove. I think it improved my video, because I was able to go back and take out unneeded shots to make it shorter. I feel that it makes it less confusing and it flows better. The video is better without the unnecessary shots. We also were supposed to make the shots transition on the beat, using markers. I made some longer and I made some shorter, in order to get my shots go to the beat. It made the transitions smoother and overall better. Overall, I think my video transitions better. I am happier with the compressed version than the original. I like this version more than the original and I think it is an improvement.

Thursday, October 23, 2014

Sphere Tutorials


Illustrator Tutorial:
http://pixelrockit.com/create-stylish-3d-shapes-with-adobe-illustrator/

Photoshop Tutorial:
http://4-designer.com/2013/09/3-minutes-to-make-a-hairy-ball/#.VE5wCtykV4M

Spheres represent wholeness and unity. They represent completion. Circles and spheres help with dispersion and distribution. They are two connecting columns. They are more than just a shape.

The processes were different. For the one with triangles, which I made in Illustrator I drew the shapes first. I drew the triangles and created a pattern. Then, I created a circle. For the fuzzy sphere, I created a circle and applied blurs and distortions to get the look. Then, I smudged it. 

With Illustrator, there were many option I could select to create the look I wanted. In Photoshop, the steps had to be a certain way. The Illustrator tutorial was less complex and it was easier to complete. In Photoshop, I had to use more tools to create the shading. In Illustrator, I could select an option to shade for me. In Illustrator, I could make the shape filled in. In Photoshop, if I wanted the shape filled in, I had to do that at the beginning. 

In both programs, I learned how to create easier and better spheres. In Illustrator, I learned an easier way to shade. In Photoshop, I learned how to copy and paste between layers.

Red Spheres


For my personal touch, I added my initials and I made my spheres bouncing. My sphere from Illustrator is the first one. My sphere from Photoshop is the second one. My sketch is the third one. I preferred making spheres in illustrator, because I am more familiar with it. I thought the process was simpler. In Photoshop, there were more steps and they were more complex. However, I like the look of my Photoshop sphere better than my Illustrator sphere. I think it looks more better and I like the shading on it better. I think the highlight looks better. I think I need to improve on my shadows.


Wednesday, October 22, 2014

Music Video

The project was to make a music video. In this project, collaboration was important. Collaboration was similar to the collaboration used in the last project, because we all had to depend on each other to get the work done, quickly and correctly. Communication and understanding was vital in order to have a successful project. Although there was some lack of communication and some confusion, overall my group worked together well. We got everything we needed to get done and we did it well. In the future, we need to improve communication to diminish confusion and to make the process easier and quicker. Our group did well in thinking of ideas and expanding on the story to create a meaningful video. We had many ideas and we made a video that we all are happy with. In the end, I am happy with how this video turned out. I am happy with all of the shots.

Friday, October 3, 2014

Personal Logo


Psychology, symbolism and personality of the color, shape, and font tells a story and evoke emotion. Each color evokes a different emotion and shapes and fonts help convey your message.

I started by sketching my logo. I sketched a variety of logos with different shapes and styles. I experimented with circles with a more angular logo and rectangles with a curved logo. After I sketched, I started making artboards. I made 32 different logos. I really liked how the logos in circles looked, compared to the squares. I continued to sketch and I eventually decided on the one seen below. I had the idea to pick two colors and have the 'z' and the loop of the 'z' be a mix between the other two colors. I decided on blue, yellow and green because they were easily visible together. They can appear on different color backgrounds and remain legible. Blue symbolizes tranquility and loyalty. I feel that those words really describe me. It also represents intelligence, which I want myself as a brand to have. Green conveys peace and refreshment. Yellow represents optimism, friendliness, and creativity, which I feel clearly represents me. Yellow can also be used to represent fragility and that is important to me, because in a lot of things that I do, including dance and graphic design, I have to use emotion to my benefit. When creating the final logo, I used what I learned from prior tutorials, to help decide which tool (brush, pen, pencil, etc.) would best fit the style I was going for. I experimented with each tool.

I learned more about color and shape psychology. When choosing a shape, I chose a circle, because it represents a lot of values that fit my brand and my self. Circles represent family, friendship, and stability. I feel that family and friends have defined me, as a person, and as a brand. I also learned more about expanding text to fill in shapes.

I want to learn more about the difference between the three tools I used the most, pen, pencil and brush. In the end, I chose a logo designed with the brush tool, because it had the look I envisioned. I also want to learn more about filling shapes with other methods.

I think I had a variety of logos and I really went below the surface. I did well on creating a unique and thought-out logo. I am very pleased with the look of my logo and the story it tells.

If I could change anything about my logo, I'd make the stroke of the 'z' thicker, because it would be easier to differentiate it from the rest of the logo.

In the future, I'd really like to improve by sketching more and utilizing other tutorials or inspirations.


Thursday, September 25, 2014

My Tutorial

My tutorial was a smoky brush tutorial. I found it at http://design.tutsplus.com/tutorials/how-to-create-smoky-brushes-and-type-in-illustrator-cs4--vector-3226

It was relatively simple, but it was difficult making it look exactly how I wanted to. I didn't want it to be overly complicated, but I didn't want it to be too simple. I created a variety of brushes and strokes until I finally reached the brush that I was happy with.

My favorite part of the tutorial was experimenting with brush shapes and sizes. I liked making the brush complex and seeing how it differed from a simpler brush. My favorite brush that I created was the most complex.

My least favorite part was copying the lines because it was the longest part and it was repetitive.

I learned how to create a brush. I also learned that when drawing with the pencil tool, the speed that you draw at, changes the look. If you draw quickly, it gives a different effect than when you draw slower.

The part that I did well was creating a variety and exploring brushes.

In the future, I want to learn more about the brush tool and how it differs from the pen and the pencil tool.

In the future, I need to research tutorials that can expand on the creation of brushes.

Tuesday, September 23, 2014

Google Logo


 Many people are unaware of the history behind Google's logo.  The font and colors have been selected carefully.

Google had many designs before the current logo. Originally, Google was called BackRub. The name was changed to Google, a play off of googol, which is a term for the number represented by 1 followed by 100 zeros. After the name was changed, they experimented with the colors and even added an exclamation point. They experimented with different O's and they eventually settled on the current logo designed by Ruth Kedar.

The colors of Google were chosen carefully. They are the three primary colors and one secondary color. With no pattern present, it references the idea that Google doesn't follow the rules. 

The font is a simple font with defined contrast. It has a large x height. It is strongly calligraphic. The font is called Catull. It is simple and good for advertisement.
My favorite of the logos is the one with penguins because I like penguins.


Wednesday, September 17, 2014

The Chase


I learned how to add music and sound effects in Final Cut Pro.  I also became more familiar with Final Cut Pro.

In future projects, I will be able to add music and sound effects to enhance my videos. I will grow more comfortable with Final Cut Pro.

In this project, we collaborated more than in previous projects. We all had different jobs and we had to work together and communicate to complete the project. The person creating the storyboard had to collaborate with the actors and the person filming for success. We had to help each other and depend on each other. If there was a lack of communication, the project would not be completed quickly and successfully.

In the future, I will be able to collaborate better by communicating more. I will make sure everything is clear to avoid any confusion. I will also make sure that I fully understand the plan for the project.

Thursday, September 11, 2014

Anatomy and Personality of Archer Hairline

 The font that describes my personality is Archer Hairline. It is emotional, understated, progressive and disciplined.

 Archer Hairline is an emotional font. I think with my emotions.

Archer Hairline and I are both very understated. It is not extremely assertive, but more laid-back. 

It is a very progressive font. We are both very modern and current.

Archer Hairline's font is precise and exact. It's lines are perfectly straight and symmetrical. 

Friday, September 5, 2014

Second Six Shot Sequence


In this project, I learned how to perfect the six shot sequence. I learned to make the video seem less forced and more natural. I also learned that storyboards are more important as the videos get more complex, because it they help get all of the shots needed and help with staying organized. They also make editing either.


In future projects, I will be able to use the six shot sequence to tell a story. I will be able to use the shots to tell a continuous story. I will apply the experience I gained from this project on future projects to enhance my videos.

I define collaboration as working with others to achieve a common goal. In this project, I had to work with my partner to create and finish the video. Collaboration is important in any project. If you are unable to collaborate well, your video will be unsuccessful.